
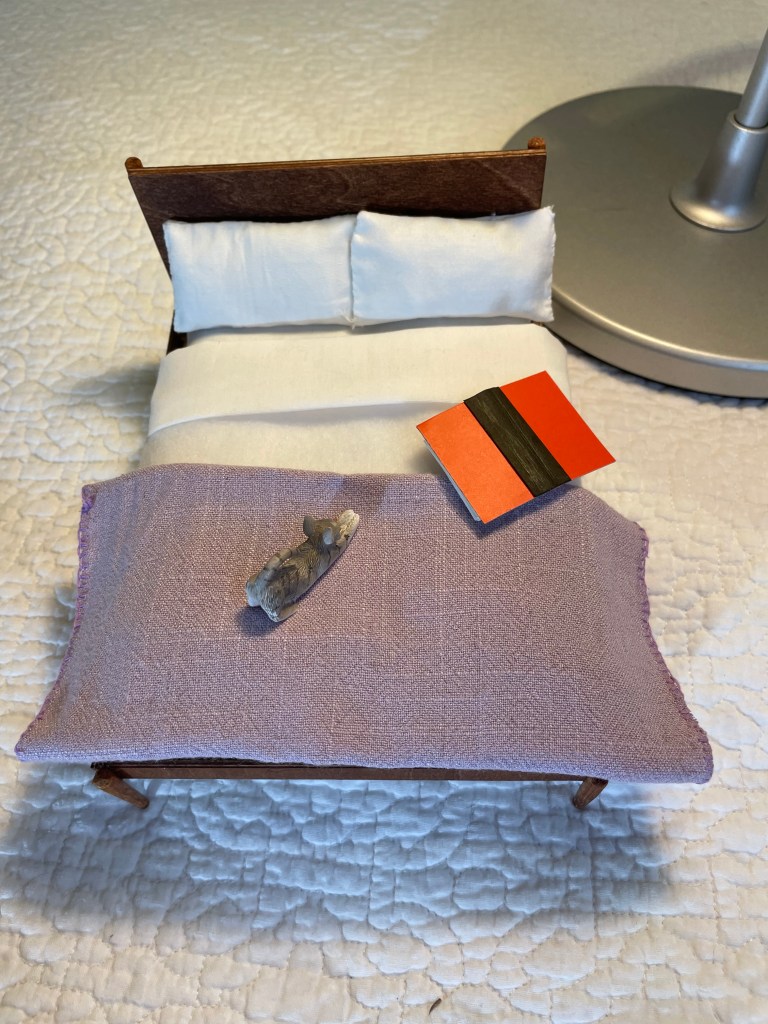
This 1:12 scale midcentury modern bed for A.’s house was inspired by West Elm’s Midcentury Bed in Acorn (link).

Supplies:
- 1/16 inch basswood sheets (Midwest Products are the best but $$ (e.g. link); I made this one using cheaper ones from Amazon (link)
- stain or paint of your choice (I used Varathane interior wood stain in gunsmoke from my local hardware store)
- polyurethane sealant
- chopsticks or thin dowels
- 1/4-inch square dowel (link or your local hardware store)
- scrap wood pieces
- wood glue (I use Aleene’s: link)
- masking tape
Nice-to -haves:
- Cricut Maker cutting machine
- corner clamps (link)
- mini clamps (link) – the quality on these is not great
Building the bed
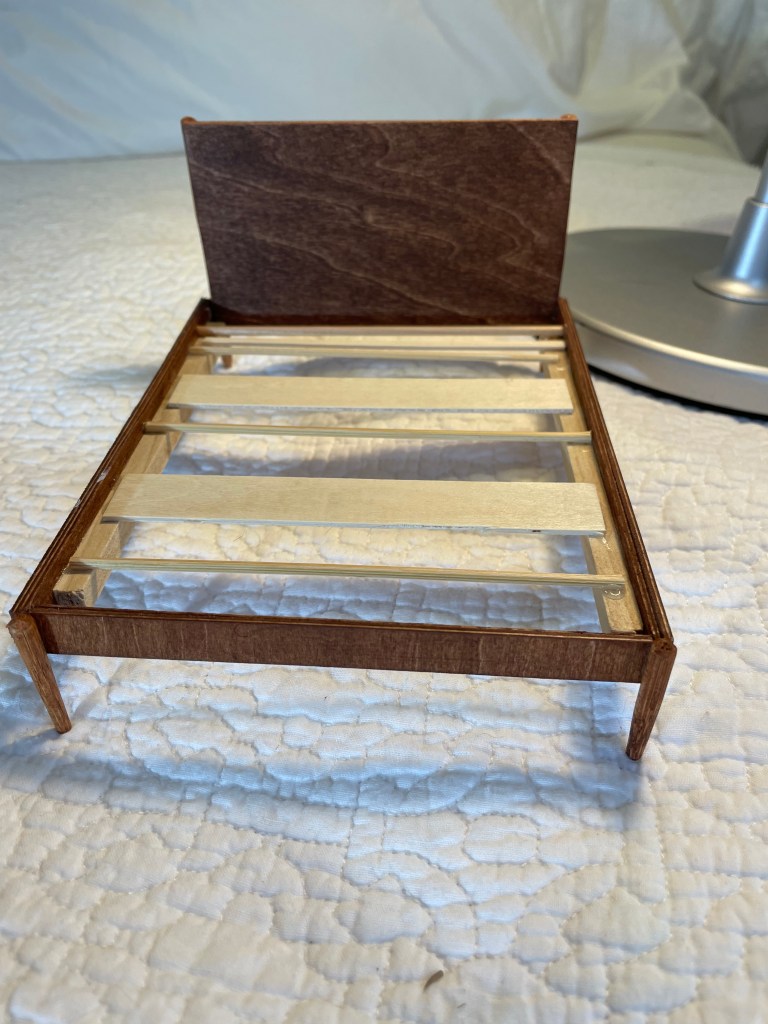
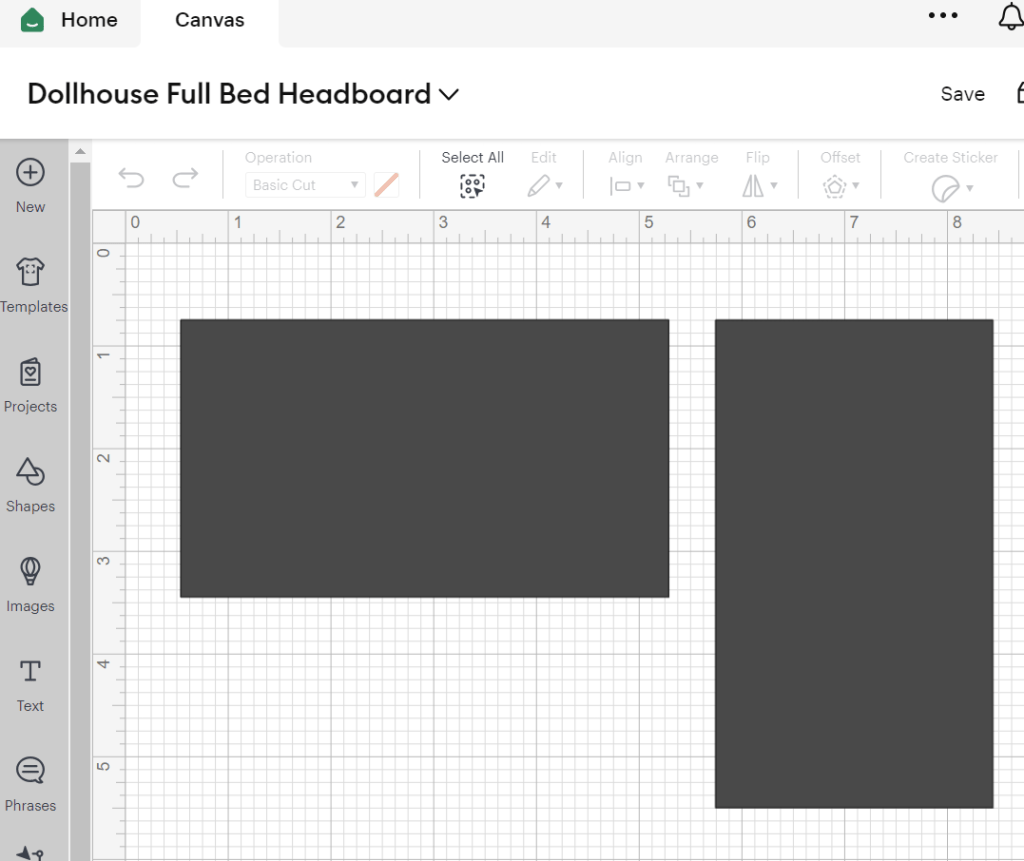
Step one: Cutting: Cut five rectangles out of 1/16″ basswood. The headboard pieces are 4.75 by 2.7 inches; footboard 4.75 by .458 inches; and sides are 6.20 by .458 inches. You will need two pieces of the headboard and sides and one piece of the footboard.
I created an SVG file in my Design Space to use with my Cricut Maker. For the headboard, I inverted the height and the width on the second rectangle so that one piece will be with the wood grain and one will be against the grain. (Just rotating it by 90 degrees in Design Space will not change how it is printed.)
If you don’t have a Cricut, you can cut the rectangle shapes with a handsaw. But my refurbished Cricut Maker has been such a good purchase.
For the legs, cut two 3.367-inch lengths and two 1.12-inch lengths of chopsticks or dowels. I used my utility knife (link) but a small saw or strong scissors work as well. I like using chopsticks because they are already tapered at the end like the legs on the West Elm bed.
Cut two 4-inch lengths of the square dowel.
Step two: Sand and stain or paint: Sand each piece of the basswood and legs. Stain or paint. Always paint or stain before gluing because stain and paint don’t adhere well to dried glue. If staining, let dry overnight between coats. If painting, wait a few minutes between coats.
Step three: Glue the two pieces of the headboard together to make a stronger, 1/8″ thick headboard. Assemble the basic square of the frame. I have these corner clamps from Amazon but they are a little big for the double size of this bedframe so I could only use two at a time. Masking tape or a gluing jig can help keep the shape as well. Let dry overnight.
Glue the 4-inch lengths of square dowel to the inside bottom sides of the rectangular frame. I used mini clamps on the side pieces. Let dry overnight.
Glue the legs to the bed. Glue pieces of scrap wood across the square dowels to support your mattress.
Step four: Finish with polyurethane spray. Don’t forget to open your windows!

Here is my tutorial for making the mattress, sheets, and blankets (link).
P.S. the stretching tabby on the bed is from miniatures.com (link).
The Amazon links in this post are affiliate links. If you purchase using one of these links, we earn a small commission.

Leave a comment