Our first 3D printer was one I purchased for my kids a few years ago. It was a great, user-friendly introduction to the technique. But once we started co-opting it for miniature making, we were pretty limited in what we could accomplish. The build area was not quite big enough for a mini bathtub, and fine details were difficult to print. After listening to Jim from TheEdgeofTech on the My Miniature Obsession podcast (link), we were persuaded it was time for an upgrade.
Resin versus Filament
The biggest decision point in miniature 3D printing is whether to use resin or filament. Resin produces a higher quality product with very fine details, but there are a lot of hassles, including smells, cleaning, and curing processes.
Our workshop is in a home filled with kids and pets, so resin is not the best fit for us. But if you are looking for inspiration of what an amazing artist can accomplish with resin, checking out EstherMiniatures’s stained glass work (link or link).
Filament printers have come such a long way in recent years, and we were reassured by Jim and his wife Lindsay’s advice for how to use a filament printer for minis. (See Lindsay’s video on TheEdgeofTech here: link.)
Our 3D printer selection
There are many filament printer options. After further research, we decided the Bambu Lab P1S with AMS was the right fit for us. (And we purchased through Jim’s affiliate link (here) so that he would get credit for all of his helpful advice.)
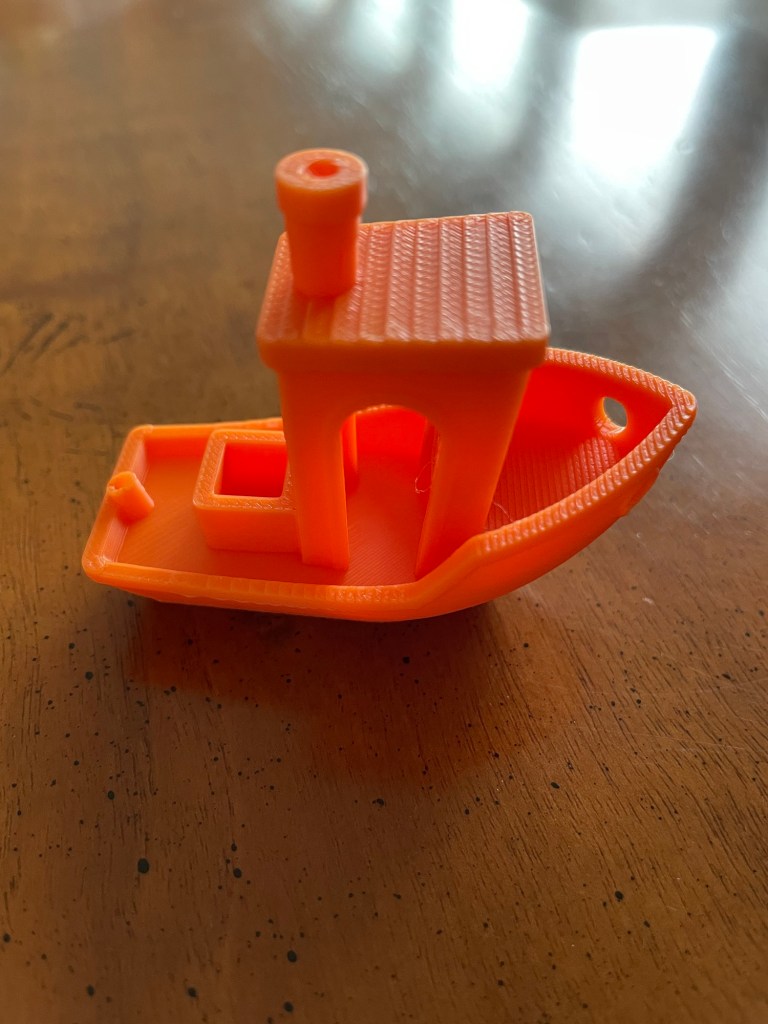
This unboxing video from TheEdgeofTech shows just how easy the printer was to assemble and set up (link). It took us about 20 minutes. For our first print, we chose a benchy in the orange filament provided with the P1S AMS package.
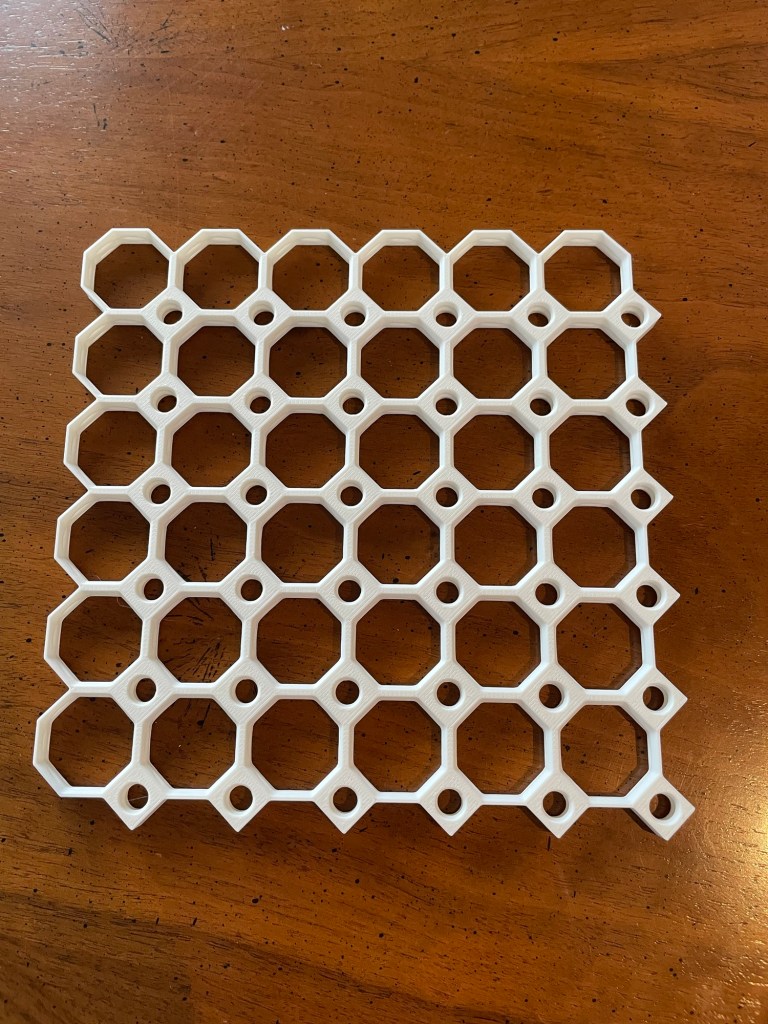
For our second print, we began work on a multiboard for the workshop. This will function like a pegboard for tools and supply storage, but is more modular. (Check out the multiboard website here: link.)
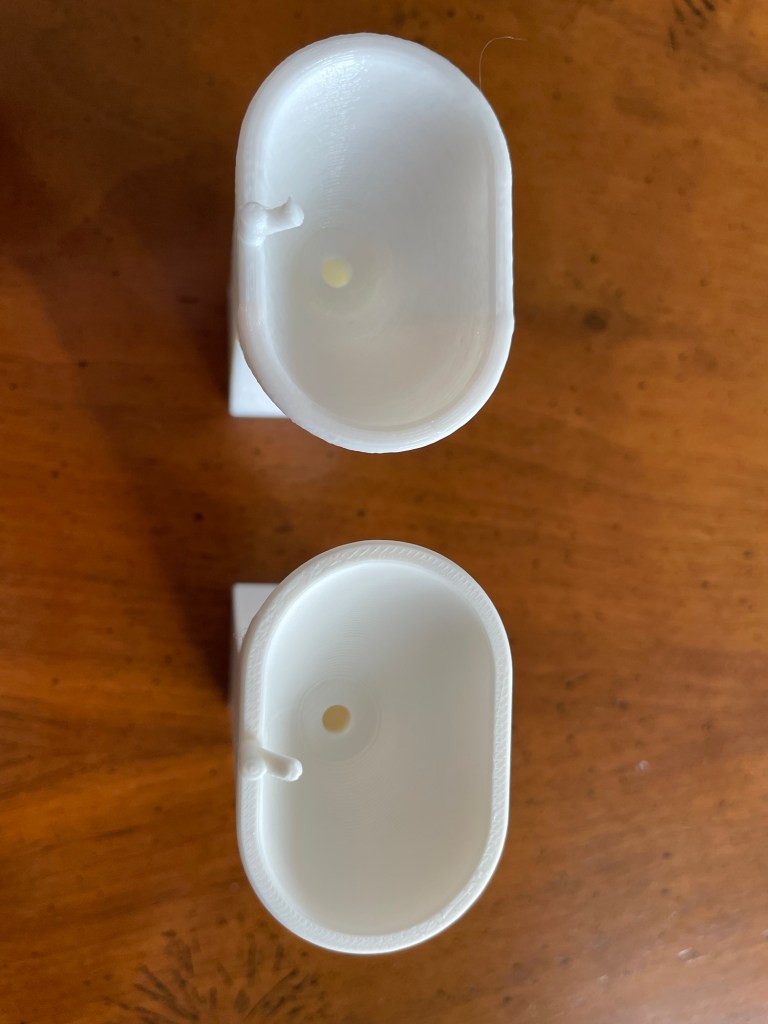
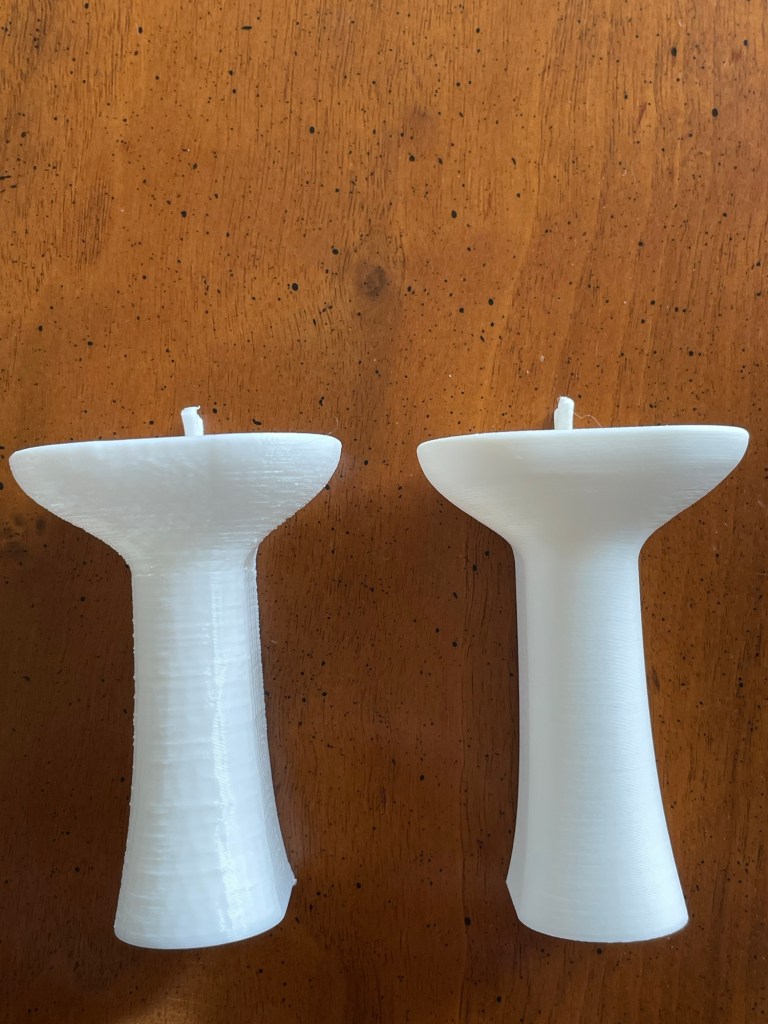
Side by Side Comparison
To demonstrate the difference between our kid-friendly printer and the P1S, here is the same 1:12 scale bathroom washstand file printed on both. (The free file is available here: link.) As you can see, the detail is much better from the P1S. We are using Bambu Lab PLA Matte filament, which also helps to reduce visibility of the layer lines. We made this with the 0.4mm hotend, but Bambu Lab has an even smaller 0.2mm hotend, which Lindsay recommends for pieces smaller than one inch.

Challenges
Although the AMS worked initially, we got a clog somewhere in the system and bypassed it for these early prints. The learning curve is definitely steeper than with our first, kid-friendly 3D printer, but that is the challenge we signed up for. And, as you can tell from Jim’s unboxing video, the P1S is accessible enough for anyone with patience and a willingness to try new things.
3D printing is a really interesting technology. Together with laser cutting machines and Cricut cutting machines, it is revolutionizing DIY miniature creations. We can’t wait to share what we are cooking up for our Etsy shop with this fabulous new tool.

Leave a comment